Small updates. Clarified that it has to be a click with the laser for overwriting. Gave more information on how overwriting works. |
Added information about cloning a world. |
||
| Line 38: | Line 38: | ||
=== Cloning Worlds === | === Cloning Worlds === | ||
To clone a world orb, click on it with your laser and a context menu will pop up. Select the option "Clone World". This will split the world orb into two, the original world orb, and another world orb of the same name but with "(Copy)" at the end of it. | |||
This does '''NOT''' duplicate the instance(s) itself (it is a copy of the world with everything in it, matching the original), and does '''NOT''' take up space in your inventory or another spot in the "My Worlds" tab in the [[Dash]]. | |||
=== World Deletion === | === World Deletion === | ||
Revision as of 04:01, 6 July 2024
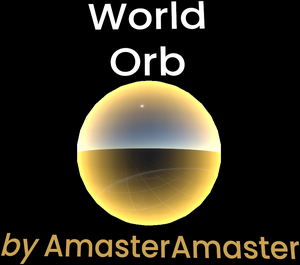
A World Orb is a item that represents a world as a reference (not the world itself). It shows the name on top, a preview of the world inside the orb, and who created the world on the bottom (whether as a User or Group).
This can be saved as an item and can have its own resrec link due to that.
The world orb has different rim colors to represent what the world is and what it is doing:
| Color | What it means |
|---|---|
| Clear or Nothing | The world is not new and was opened before (and not focused in the world) |
| Yellow | A newly created world. |
| Orange | The world is open and you are not focused in it. |
| Purple | ... |
| Pink | ... |
Features
The world orb allows the user to interact with it, enacting different options based on the actions or selection in the context menu from it.
Opening And Joining Sessions
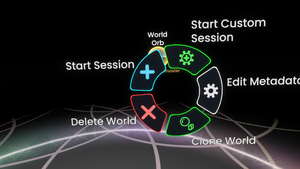
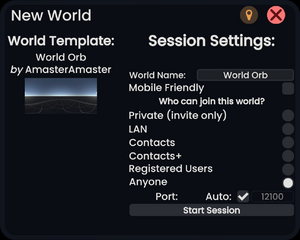
A world orb allows users to join sessions or to create and host one.
Click or use primary while aiming your laser on the world orb, this will open a context menu with options. Select "Start Session" or "Start Custom Session". Starting a session will open the world in the last known access level. Starting a custom session will give you different options and settings before opening the world.
You can also double click with your laser (or physically touch it twice quickly) at the world orb and it will start a session.
Cloning Worlds
To clone a world orb, click on it with your laser and a context menu will pop up. Select the option "Clone World". This will split the world orb into two, the original world orb, and another world orb of the same name but with "(Copy)" at the end of it.
This does NOT duplicate the instance(s) itself (it is a copy of the world with everything in it, matching the original), and does NOT take up space in your inventory or another spot in the "My Worlds" tab in the Dash.
World Deletion
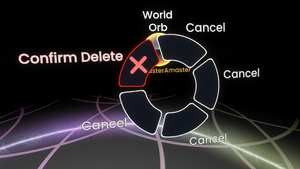
To delete a world, you must click or aim your laser on it and press primary, then select the "Delete World" option. This will open the context menu again asking if you really want to delete the world, and selecting delete from here will open one last menu (one that is more private and in your local user space) asking you if you really want to permanently delete this world. Pressing delete one last time will remove the world from your inventory and storage (and the world orb from the world your in).
Overwriting Worlds
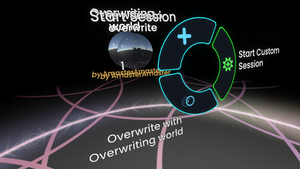
To overwrite a world, prepare 2 world orbs, one to overwrite, and another to overwrite with. Then use your laser and grab the world orb and drag it to the other one, then click with your laser to open your context menu. You should see the option "Overwrite with (World Name)". You must let go of your grip of the world orb and select the overwrite button, then it will ask you if you really want to overwrite the world. Once you confirm, the world orb will show "Overwriting..." on the top, then a few moments later the world orb is ready to be interacted with once more.
Overwriting a world preserves the world record.
Editing World Metadata
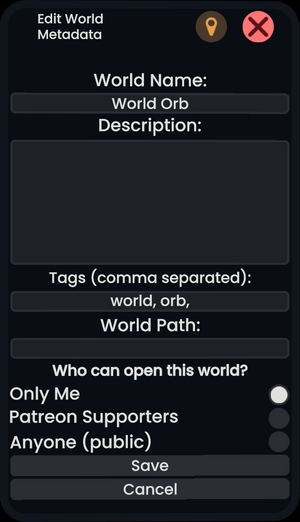
When you need to edit some metadata information, such as the world name, description, tags, and who can open the world, you can click on the world orb and select "Edit Metadata". A menu should pop up giving you the option to edit and update that information. After saving the change, give it a few minutes to update on the server side of Resonite for the changes to take effect.